Merhaba arkadaşlar size güzel bir tool'dan bahsedeceğim codeplex'den indirebileceğiniz bu tool ms crm 4.0 performansını ölçmek için kullanabileceğiniz bir tool'dur. Bu tool'u canlı ortam yerine test ortamınızda test etmenizi öneririm. Aşağıdaki özellikleri test edebilirsiniz.
1. Multi Organization Performance Testing Support
2. Multi Server Deployment Performance Testing Support
3. Outlook Synchronization and Offline Performance Testing Support
4. Data Management Performance Testing Support
5. Workflow Performance Analysis Support
6. Email Matching Performance Testing Support
7. Ease of deployment of the Toolkit through an MSI package with enhanced configuration of the toolkit.
Bu link'den tool'u indirebilirsiniz.
7 Aralık 2010 Salı
8 Kasım 2010 Pazartesi
Kullanıcının Id'sini Alma Script'i(Get Current UserId)
Merhaba arkadaşlar crm'i kullanan kullanıcının(WhoAmI) id'sini aşağıdaki script'i form'un onload'una yazarak bulabilirsiniz.
alert(GetCurrentUserId());
function createCookie(name,value,days) {
if (days) {
var date = new Date();
date.setTime(date.getTime()+(days*24*60*60*1000));
var expires = "; expires="+date.toGMTString();
}
else var expires = "";
document.cookie = name+"="+value+expires+"; path=/";
}
function readCookie(name) {
var nameEQ = name + "=";
var ca = document.cookie.split(';');
for(var i=0;i < ca.length;i++) { var c = ca[i]; while (c.charAt(0)==' ') c = c.substring(1,c.length); if (c.indexOf(nameEQ) == 0) return c.substring(nameEQ.length,c.length); } return null; } function GetCurrentUserId() { try { var UserId = readCookie('UserId') ; if ( UserId == null ) { var soapBody = ""+
""+
"
" ";
var soapXml = "";
soapXml += GenerateAuthenticationHeader();
soapXml += soapBody;
soapXml += " ";
var xmlhttp = new ActiveXObject("Msxml2.XMLHTTP");
xmlhttp.open("POST", "/mscrmservices/2007/crmservice.asmx", false);
xmlhttp.setRequestHeader("Content-Type", "text/xml; charset=utf-8");
xmlhttp.setRequestHeader("SOAPAction", "http://schemas.microsoft.com/crm/2007/WebServices/Execute");
xmlhttp.send(soapXml);
xmlDoc=new ActiveXObject("Microsoft.XMLDOM");
xmlDoc.async=false;
xmlDoc.loadXML(xmlhttp.responseXML.xml);
createCookie('UserId',xmlDoc.getElementsByTagName("UserId")[0].childNodes[0].nodeValue,1);
//var buid = xmlDoc.getElementsByTagName("BusinessUnitId")[0].childNodes[0].nodeValue;
//var orgid = xmlDoc.getElementsByTagName("OrganizationId")[0].childNodes[0].nodeValue;
return xmlDoc.getElementsByTagName("UserId")[0].childNodes[0].nodeValue;
}
else
return UserId;
}
catch(err)
{
}
}
alert(GetCurrentUserId());
function createCookie(name,value,days) {
if (days) {
var date = new Date();
date.setTime(date.getTime()+(days*24*60*60*1000));
var expires = "; expires="+date.toGMTString();
}
else var expires = "";
document.cookie = name+"="+value+expires+"; path=/";
}
function readCookie(name) {
var nameEQ = name + "=";
var ca = document.cookie.split(';');
for(var i=0;i < ca.length;i++) { var c = ca[i]; while (c.charAt(0)==' ') c = c.substring(1,c.length); if (c.indexOf(nameEQ) == 0) return c.substring(nameEQ.length,c.length); } return null; } function GetCurrentUserId() { try { var UserId = readCookie('UserId') ; if ( UserId == null ) { var soapBody = "
"
"
"
var soapXml = "
soapXml += GenerateAuthenticationHeader();
soapXml += soapBody;
soapXml += "
var xmlhttp = new ActiveXObject("Msxml2.XMLHTTP");
xmlhttp.open("POST", "/mscrmservices/2007/crmservice.asmx", false);
xmlhttp.setRequestHeader("Content-Type", "text/xml; charset=utf-8");
xmlhttp.setRequestHeader("SOAPAction", "http://schemas.microsoft.com/crm/2007/WebServices/Execute");
xmlhttp.send(soapXml);
xmlDoc=new ActiveXObject("Microsoft.XMLDOM");
xmlDoc.async=false;
xmlDoc.loadXML(xmlhttp.responseXML.xml);
createCookie('UserId',xmlDoc.getElementsByTagName("UserId")[0].childNodes[0].nodeValue,1);
//var buid = xmlDoc.getElementsByTagName("BusinessUnitId")[0].childNodes[0].nodeValue;
//var orgid = xmlDoc.getElementsByTagName("OrganizationId")[0].childNodes[0].nodeValue;
return xmlDoc.getElementsByTagName("UserId")[0].childNodes[0].nodeValue;
}
else
return UserId;
}
catch(err)
{
}
}
14 Ekim 2010 Perşembe
Microsoft Dynamics CRM 2011 Walkthrough Part 1
Merhaba arkadaşlar aşağıdaki slayt da CRM2011'le gelen bazı özellikleri görebilirsiniz.
12 Eylül 2010 Pazar
MSCRM 4 to MSCRM 2011 JavaScript Converter
Merhaba arkadaşlar codeplex'de yeni yayımlanmış olan bir tool'dan bahsetmek sizlere istiyorum. Tool'un amacı ms crm 4.0 yazmış olduğunuz javascript kodlarını kolayca MSCRM 2011'e çeviriyor. Bu tool CRM 4.0'dan CRM 2011'e geçerken işimize çok yarayacak. Tool'u buradan indirebilirsiniz.


CRM 2011 Beta sürümü yayınlandı.
CRM 2011 Beta sürümü yayınlandı. Aşağıdaki link'den indirebilirsiniz.
Download
Download
29 Ağustos 2010 Pazar
MS CRM Araç listesi (Dynamics CRM Tools)
Merhaba Arkadaşlar,
Bugün sizlere Dynamics crm ile ilgili bugüne kadar yapılmış olan MS CRM araçlar listesini hazırladım. Umarım faydalı olur.Microsoft Dynamics CRM Demonstration Tools (for Microsoft Dynamics CRM 4.0)
CRM Configuration Manager
Bulk Update and Export
tool
Microsoft CRM 4.0 Developers Tool
MS CRM Javascript Intellisense Generator
20 Ağustos 2010 Cuma
Data Maps&Data Imports
Hi all to you,
I will mention about the Ms crm 4.0 data import tool today. I will also show how to prepare csv file and import data to Ms crm 4.0. I hope it will be good referance for importing data to Ms crm 4.0.
Data Maps
To create a new Data Mapping, you must have a sample CSV file with at least one record on it. Additionally, the first row must be the headers, which cannot be empty. For example, the following CSV data file is valid:

To create a new Data Map, follow these steps:


Data Imports
you must have a CSV file with the header labels and at least one data record on it to import data with the Import Data Wizard. Ideally, you should use the same file you used when creating the Data Map.
1. | Go to Tools, Import Data from the top menu |
2. | Enter the full local path of the CSV file you want to import, or click the Browse button to locate the file on your hard disk. |

3. Select the CSV file which you want to import.

4. Select the Data Delimeter and Field Delimeter then click next.

5. | Record Type shows all the entities that the loaded file can be related to (see Figure 5.0). Select the entity type you want to import. For this example, select the Contact entity.  |
Figure 5.0
Depending on the names of the fields in the CSV file, the Map might be automatically resolved, as in Figure 5.1. Automatic mapping resolved.

Figure 5.1. Automatic mapping resolved.
If the Map is not automatically resolved, you must choose a Map from one that was created before. After you select the Map, the wizard validates the fields against the CSV file you are trying to import. Any errors in the mapping are displayed, which prevents the import from continuing and avoids data corruption and errors.
For automatic mapping resolution, you must enter the headers the same way as they are displayed in the forms, and you cannot use the schema names. The wizard is case-sensitive as well, so be sure to enter the headers in the right case.
For automatic mapping resolution, you must enter the headers the same way as they are displayed in the forms, and you cannot use the schema names. The wizard is case-sensitive as well, so be sure to enter the headers in the right case.
6. | Select the user you want to assign the imported records to. You also have the option to tell the wizard to check for duplicates records or to ignore duplicates |


8 Temmuz 2010 Perşembe
Webservices.dll'i GAC'a ekleme
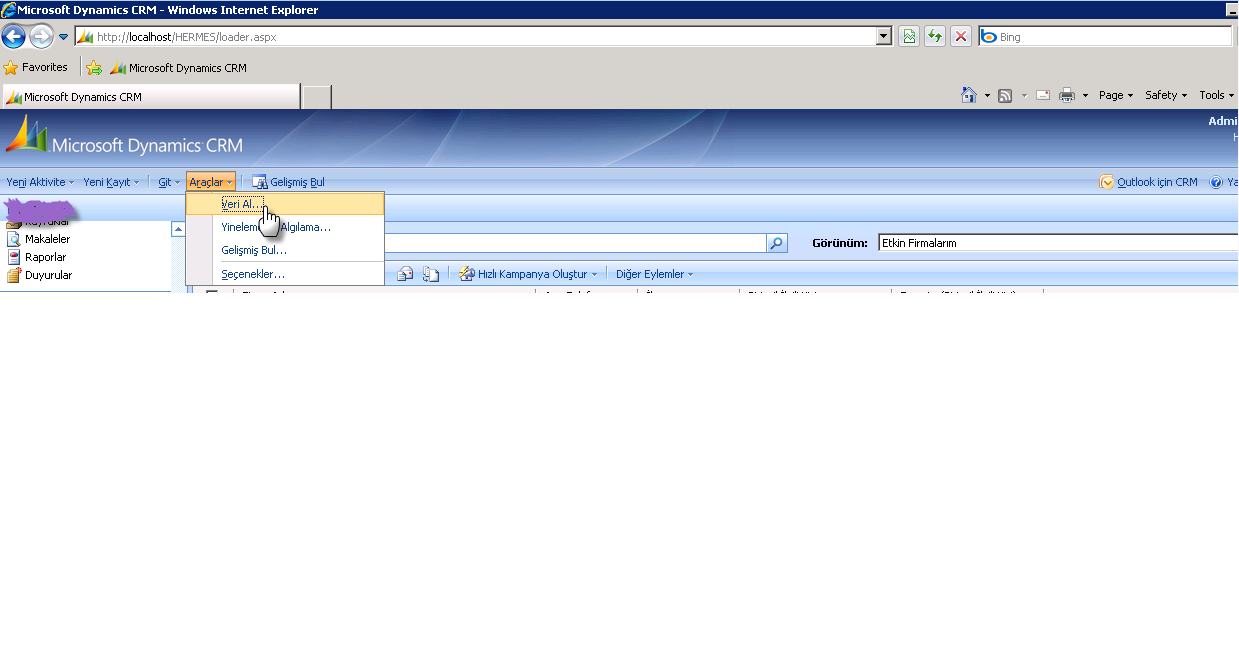
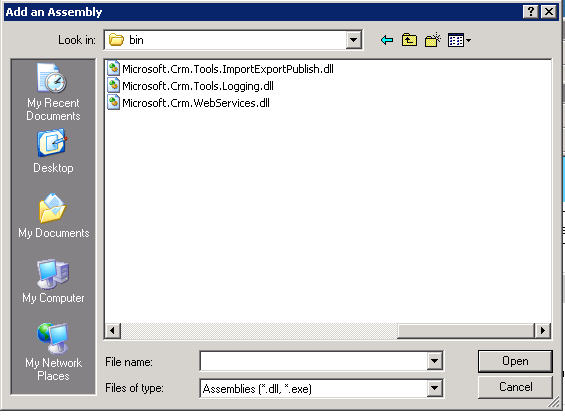
Merhaba arkadaşlar bugün sizlere kısaca Webservices.dll'i GAC'a nasıl ekleyeceğinizi anlatacağım. Bu işlemi yapmamızdaki amaç Webservices.dll, GAC(C:\Windows\Assembly folder) içinde değil ise, crm için yeni bir uygulama yazdığınızda an invalid token error diye bir hatayla karşılaşırsınız. Bu hatayı giderebilmek için .Net Framework SDK 2.0 configuration tool indirelim. Aşağıda gösterdiğim gibi .Net Framework SDK 2.0 configuration tool ile Webservices.dll'i GAC'a ekleyelim.
Aşağıdaki link’den .Net Framework SDK 2.0 sdk’yı indirebilirsiniz.
.Net Framework SDK 2.0 sdk’yı kurdukdan sonra aşağıdaki adımları izleyerek Program Files\Microsoft Dynamics CRM\CRMWeb\bin içinden Webservices.dll’li GAC ekleyelim.
1)

2)

3)

4)
26 Haziran 2010 Cumartesi
Header Builder
Merhaba arkadaşlar bugün sizelere kullanışlı bir tool’dan bahsedeceğim. Header Builder adındaki tool’un amacı CRM uygulamasının arka planındaki logoyu değiştirerek logonuzu koyabilmek. Aşağıdaki link’den tool’u indirebilirsiniz.
Header Builder
Header Builder'ı indirdikten sonra sıkıştırılmış dosya içinden HeaderBuilder.exe yi çalıştıralım.
 Daha sonra browse tıklayarak logomuzu alalım.

Logomuzu yükledikten sonra jpeg formatında masthead adıyla kaydedelim. Son olarak kaydettiğimiz dosyayı crmWebRoot\_imgs altına yapıştıralım.

Header Builder
Header Builder'ı indirdikten sonra sıkıştırılmış dosya içinden HeaderBuilder.exe yi çalıştıralım.
Logomuzu yükledikten sonra jpeg formatında masthead adıyla kaydedelim. Son olarak kaydettiğimiz dosyayı crmWebRoot

3 Haziran 2010 Perşembe
Update Rollup 11 for Microsoft Dynamics CRM 4.0
Microsoft has released Update Rollup 11. This is a tested, cumulative set of updates for Microsoft Dynamics CRM 4.0. It includes performance enhancements that are packaged together for easy deployment.
You can download following link: http://www.microsoft.com/downloads/details.aspx?displaylang=en&FamilyID=f84f2bfb-393d-4b90-bf1b-300a82ec6083
18 Mayıs 2010 Salı
Reporting Service'le yapılmış bir raporu pdf çevirme.
Merhaba arkadaşlar bugün işinize çok yarayacak bir kod örneği vereceğim. Bugünkü konumuz Reporting service(.rdl) le yapılmış bir raporu pdf çevirmek. Bu işlemi yapmamdaki amaç Blackberry veya benzer bazı PDA’ lerle Ms crm den Reporting service’le yapılmış bir raporu çektiğimizde bunu göstermeyecektir Bu raporu pdf çevirdiğimizde sorunsuz bir şekilde şeklinde çalışacaktır. Bu konuda fazla ayrıntıya girmeyeceğim. Size bu işlemi nasıl yapacağınızı kısaca anlatacağım. İlk olarak yeni bir Reports Application uygulaması açın. Bu uygulamayı ihtiyacınıza göre şekilendirin ve alacağı parameterleri yazın. Daha sonra yeni bir .aspx uygulaması açın ve page’in load’una aşağıdaki kodu ekleyin. Uygulamanıza ReportExecution2005.wsdl web service kısmına RSWebReference adıyla ekleyin. Son olarak Ms crm’e bir button ile yaptığınız aspx sayfasını ekleyin.
using System;
using System.Data;
using System.Configuration;
using System.Web;
using System.Web.Security;
using System.Web.UI;
using System.Web.UI.WebControls;
using System.Web.UI.WebControls.WebParts;
using System.Web.UI.HtmlControls;
using RSWebReference;
using System.Text;
public partial class _Default : System.Web.UI.Page
{
protected void Page_Load(object sender, EventArgs e)
{
string oId = Request.QueryString["oId"].ToString();
ReportExecutionService rs = new ReportExecutionService();
rs.Credentials = System.Net.CredentialCache.DefaultCredentials;
// Render arguments
byte[] result = null;
string reportPath = "/Report_Project/Yeni açtığımız raporun adı";//rapaorun bulunduğu path
string format = "PDF";
string historyID = null;
//rapor uygulmamıza bir parametre yollayalım. İsterseniz aynı şekilde birden fazla parametre yollayabilirsiniz.
ParameterValue[] parameters = new ParameterValue[1];
parameters[0] = new ParameterValue();
parameters[0].Name = "rapordaki parametrenin adı";//
parameters[0].Value = oId;
string encoding;
string mimeType;
string extension;
Warning[] warnings = null;
string[] streamIDs = null;
ExecutionInfo execInfo = new ExecutionInfo();
ExecutionHeader execHeader = new ExecutionHeader();
rs.ExecutionHeaderValue = execHeader;
execInfo = rs.LoadReport(reportPath, historyID);
String SessionId = rs.ExecutionHeaderValue.ExecutionID;
rs.SetExecutionParameters(parameters, "tr-TR");
result = rs.Render(format, null, out extension, out encoding, out mimeType, out warnings, out streamIDs);
Response.ClearContent();
Response.AppendHeader("content-length", result.Length.ToString());
Response.ContentType = "application/pdf";
Response.BinaryWrite(result);
Response.Flush();
Response.Close();
}
}
Umarım işinize yarar. Gelecek yazımda görüşmek üzere...
Ms crm'de grid'lerde listelenen kayıtların saysını değiştirmek
Merhaba arkadaşlar bugün sizlere normalde desteklenmeyen, fakat bazı durumlarda sizi sıkıntılardan kurtaracak bir trick den bahsedeceğim. Hepimiz biliyoruz ki Ms crm de bulunan grid'lerde gelen toplam kayıt sayısı default'da 50 dir. Fakat siz bu sayıyı ayarlardan(settings) 250 kayıda kadar çıkarabilirsiniz.
 Buraya kadar herşey normal, farzedin ki kayıt sayımız çok fazla ve keyfi olarak bu kayıtların sayısını 1500 olarak sayfalamak istiyorsak, bu islemi crm den yapamayız. Bu işlemi SQL Studio'dan Ms crm database'ini açarak ilgili alanı update ederek yapabiliriz. Bu yöntem default yapıyı bozduğu için fazla tavsiye edilmeyen bir yöntemdir. Bu işlemde update etmeniz gereken tablo UserSettingsBase tablosudur.
update usersettingsbase set paginglimit=2000

update usersettingsbase set paginglimit=2000
11 Mayıs 2010 Salı
CRM v4.0 Reporting Service'in print hatası "Unable to Load Client Print Control"
Merhaba arkadaşlar bugün crm de Report service kullanarak custom bir rapor sayfası yaptım ve daha sonra crm entegre ettim fakat raporu print almak istediğimde "Unable to Load Client Print Control" diye bir hatayla karşılaştım. Biraz araştırma yaptım ama kimsenin kesin bir çözüm vermediğini veya karşılaşanların farklı yöntemlerle yada vazgeçerek raporu pdf çevirdiklerine rastladım. Biraz uğraş sonrasında hatanın Windows Security Update KB956391 hatası olduğunu buldum.

Çözümü ise aşağıda verdiğim linklerden gereken update leri yaptıkdan sonra çözdüm. Umarım işinize yarar.
CRM Server:
Microsoft Report Viewer Redistributable 2005 Service Pack 1 http://www.microsoft.com/downloads/details.aspx?FamilyID=82833f27-081d-4b72-83ef-2836360a904d&DisplayLang=en
SQL Server:
Security Update for SQL Server 2005 Service Pack 2 (KB954606) http://www.microsoft.com/downloads/details.aspx?FamilyID=4603c722-2468-4adb-b945-2ed0458b8f47&DisplayLang=en#filelist
21 Nisan 2010 Çarşamba
MSCRM 4.0 Documentation Generator (Excel Add-in)
Merhaba arkdaşlar bugün sizlere ms crm için yazılmış güzel bir tool dan bahsedeceğim. Microsoft'un açık kaynak sitesi olan Codeplex sitesinde bulabileceğiniz MSCRM 4,0 için hazırlanmış MSCRM 4.0 Documentation Generator (Excel Add-in) bir Excel 2007 eklentisidir. Tool’un amacı otomatik olarak Ms crm 4.0 daki bütün varlıkları ve varlıklara ait olan alan adlarını, picklist değerlerini ve yazılmış olan bütün javascript code’larını excel belgelerini almaktır. Böylece çok uzun sürüp sıkıcı olan dökümantasyon işini kısa sürede tamamlamamızı sağlayacaktır. Öncellikle Documentation Generator (Excel Add-in) indirip kuralım.( http://crm4documentation.codeplex.com/) ve daha sonra dökümantasyon işine başlayalım.

Kurulumu tamamladıktan sonra crm den Ayarlar -> özelleştirme-> Özelleştirmeleri ver girelim ve özelleştirmeleri ver özelliğine tıklayalım.

Tüm varlıkları seçtikden sonra seçili özelleştirmeleri ver ‘e tıklayalım ve son olarak customizations.xml belgesini istediniz bir yere alalım.

Daha sonra Excel’i başlatalım ve add-ins ‘e tıklayalım. Gördüğünüz gibi add-ins içinde CRM Documentation tool oluşmuştur.

Burada da Load Xml’e tıklayarak customizations.xml dosyasını yükleyelim.

Son olarak Forms seçeneğine tıklayarak tüm varlıkları ve alan adlarını ekleyelim. Varlıkları load ettikten sonra diğer seçenekleri de tıklayarak sırasıyla script ve picklist’ler için belgeleri oluşturalım.


Gelecek yazımda görüşmek dileğiyle......
10 Nisan 2010 Cumartesi
Ms Crm için yapılmış bir GoogleMap uygulaması
Merhaba arkadaşlar bugün sizlere google api lerini kullanarak küçük bir google map uygulaması yapacağım. Ayrıca yaptığımız uygulamayı crm de firma varlığına entegre ederek database den enlem ve boylamı çekerek marker aracılığıyla haritada firmanın adresini ayrıntılarıyla göstereceğim. Şimdi uygulamayı yazmayı başlayalım. Öncelikle visual stadio açarak yeni bir web proje açalım ve ismine GoogMapWebSite diyelim.

Daha sonra cs dosyasını açarak kodları yazmaya başlayalım. Comment out yaptığım yerlerde bazı açıklamalar yaptım.
using System;
using System.Data;
using System.Configuration;
using System.Web;
using System.Web.Security;
using System.Web.UI;
using System.Web.UI.WebControls;
using System.Web.UI.WebControls.WebParts;
using System.Web.UI.HtmlControls;
using System.Data.SqlClient;
public partial class _Default : System.Web.UI.Page
{
protected void Page_Load(object sender, EventArgs e)
{
string id = Request.QueryString["oid"].ToString();//burada firmanın guid’ini alıyoruz
SqlConnection conn = new SqlConnection("Data source=MSCRMDYNAMICS; initial catalog=ERCAN_MSCRM; Integrated Security=SSPI;");
string sql = "SELECT new_longitude,new_latitude FROM account WITH(NOLOCK) where accountId='" + id + "' and deletionstatecode<>2 ";
//sql query’mi yazıp enlem ve boylamı çekiyorum.
SqlDataAdapter da = new SqlDataAdapter(sql, conn);
DataSet ds = new DataSet();
da.Fill(ds);
try
{
Double a = Convert.ToDouble(ds.Tables[0].Rows[0]["new_latitude"]);
Double b = Convert.ToDouble(ds.Tables[0].Rows[0]["new_longitude"]);
/*Enlem ve boylam boş değil ise aspx sayfasını source’una yazdığım initialize adlı bir fonksiyona yoluyorum, boş ise hata mesajı veriyorum.*/
if ((ds.Tables[0].Rows[0]["new_latitude"] != DBNull.Value) && (ds.Tables[0].Rows[0]["new_longitude"] != DBNull.Value))
{
string javascript = "";
RegisterStartupScript("Close", javascript);
}
}
catch
{
string javascript = "";
RegisterStartupScript("Close", javascript);
}
}
}
Şimdi sıra geldi aspx sayfımıza source’una yazacağımız kodlara
<%@ Page Language="C#" AutoEventWireup="true" CodeFile="Default.aspx.cs" Inherits="_Default" %>
<html>
<head>
<meta name="viewport" content="initial-scale=1.0, user-scalable=no"/>
<meta http-equiv="content-type" content="text/html; charset=UTF-8"/>
<title>Ercan’s Maptitle>
<script type="text/javascript" src="http://maps.google.com/maps/api/js?sensor=false">script>
<script type="text/javascript">
var geocoder;
var map;
function initialize(a,b) {
geocoder = new google.maps.Geocoder();
var latlng = new google.maps.LatLng(a,b);
var myOptions = {
zoom: 15,
center: latlng,
mapTypeId: google.maps.MapTypeId.ROADMAP//burada yap
}
map = new google.maps.Map(document.getElementById("map_canvas"), myOptions);
var marker = new google.maps.Marker({
position: latlng,
map: map,
title:"The Account Address !"
});
}
script>
head>
<body style="margin:0px; padding:0px;" >
<form id="form1" runat="server">
<div id="map_canvas" style="width:100%; height:100%">
<asp:ScriptManager ID="ScriptManager1" runat="server">
asp:ScriptManager>
div>
form>
body>
html>
Son olarak yaptığımız uygulamayı bir button aracılığıyla crm’e ekleyeceğim. İlk olarak ISV.Config dosyasını export ediyoruz.

ve dosyayı visual stadio ile açıp aşağıdaki kodu ekliyoruz.
<Button JavaScript="var id= crmForm.ObjectId; window.open('/ISV/GoogMapWebSite/Default.aspx?oid='+id,'mywindow', 'toolbar=no, location=no, directories=no, status=no, menubar=no, scrollbars=no, resizable=no, copyhistory=no,width=473,height=322');" PassParams="1" WinParams="" WinMode="0">
<Titles>
<Title LCID="1033" Text="Google Map" />
Titles>
<ToolTips>
<ToolTip LCID="1033" Text="Google Map" />
ToolTips>
Button>
Son olarak kodu ekleyip save edip dosyayı import ediyorum.

Şimdi test edelim bu arada ekranda button görünmüyorsa ayarlardan (settings) sistem ayarlarına giriyoruz daha sonra özeleştirmeyi tıklıyoruz. Ve aşağıda gösterdiğim değerleri seçip tamam a tıklıyoruz.

Bu işlemi bitirdikden sonra altaki gibi bir görüntü ortaya çıkacaktır.

Umarım işinize yarar başka bir yazımda görüşmek dileğiyle........
Kaydol:
Kayıtlar (Atom)