I will mention about the Ms crm 4.0 data import tool today. I will also show how to prepare csv file and import data to Ms crm 4.0. I hope it will be good referance for importing data to Ms crm 4.0.
Data Maps
Data Maps let you create mappings based on other data sources (such as CSV).
To create a new Data Mapping, you must have a sample CSV file with at least one record on it. Additionally, the first row must be the headers, which cannot be empty. For example, the following CSV data file is valid:
To create a new Data Map, follow these steps:
1
Click New and then enter a name for the new Data Map (for example, City). Then select the entity you want to use on this mapping. For this example, choose City (see Figure 1.1 and Figure 1.2)
Figure 1.1 Creating a new Data Map.
Figure 1. 2
The description enables you to write a detailed description about the mapping in the text box, but it is not required.
2
Click the Save button to save your new Data Map before moving to the next step.(see Figure 2.0)
Figure 2.0
3
Select the Attributes option, which is under Mappings on the left navigation bar (see Figure 3.0).
Figure 3.0
4
Click the Load Sample Data button and find the CSV file by clicking Browse. Then click OK to load the sample data. You can map the columns by selecting Unmapped Attributes on the right and clicking the Map button (see Figure 4.0).
Figure 4.0. Mapping attributes.
5 Click Save and Close when you finish mapping the attributes.
Data Imports
you must have a CSV file with the header labels and at least one data record on it to import data with the Import Data Wizard. Ideally, you should use the same file you used when creating the Data Map.
To import, follow these steps:
1.
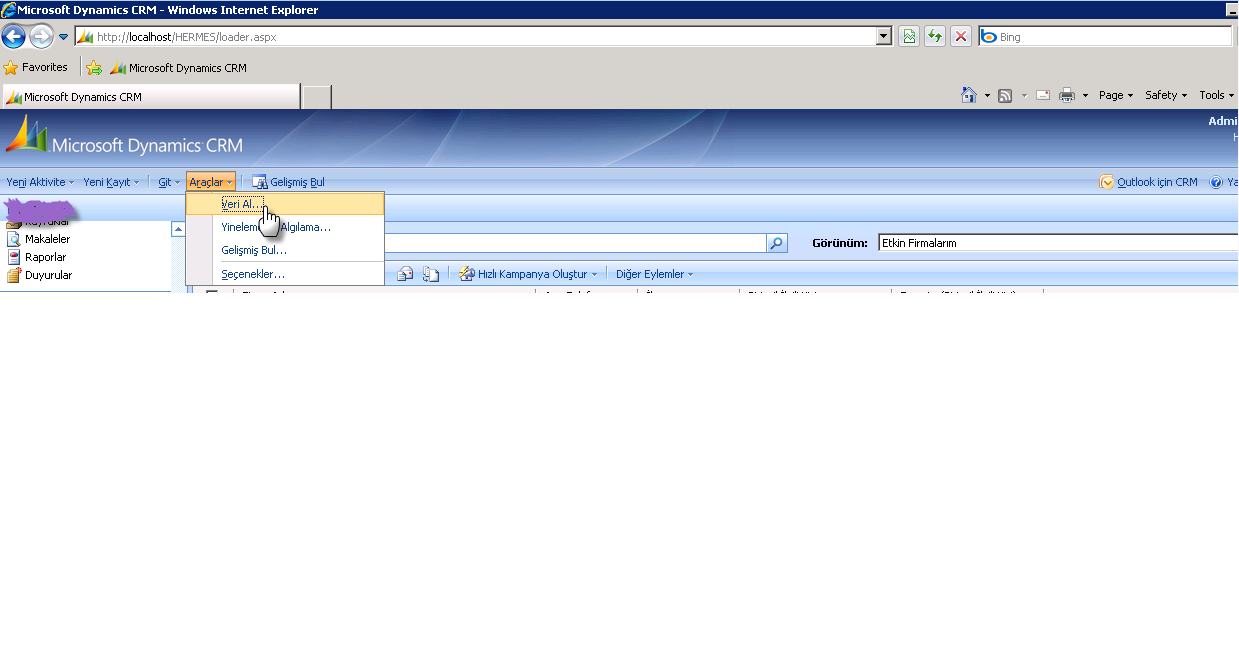
Go to Tools, Import Data from the top menu
2.
Enter the full local path of the CSV file you want to import, or click the Browse button to locate the file on your hard disk.
3. Select the CSV file which you want to import.
4. Select the Data Delimeter and Field Delimeter then click next.
5.
Record Type shows all the entities that the loaded file can be related to (see Figure 5.0). Select the entity type you want to import. For this example, select the Contact entity.
Figure 5.0
Depending on the names of the fields in the CSV file, the Map might be automatically resolved, as in Figure 5.1. Automatic mapping resolved.
Figure 5.1. Automatic mapping resolved.
If the Map is not automatically resolved, you must choose a Map from one that was created before. After you select the Map, the wizard validates the fields against the CSV file you are trying to import. Any errors in the mapping are displayed, which prevents the import from continuing and avoids data corruption and errors.
For automatic mapping resolution, you must enter the headers the same way as they are displayed in the forms, and you cannot use the schema names. The wizard is case-sensitive as well, so be sure to enter the headers in the right case.
6.
Select the user you want to assign the imported records to. You also have the option to tell the wizard to check for duplicates records or to ignore duplicates
7.
Enter a name for the import process. It is recommended that you use a friendly name here so that you later can locate the import set easily. Review the summary details before you click the Import button.